Configuring CameraX in Jetpack Compose To Take a Picture
Camera is one of the most commonly used feature in any app. Currently there is no official documentation or sample on how to take a picture using CameraX and Jetpack Compose. Let's look at how we can set this up using Jetpack Compose.
Here is the overview of what we will be covering today:
Overview
If you are new to using Jetpack CameraX, the official documentation is a good place to understand the core concepts. At it's essence, CameraX provides an abstraction on top of Camera2 and makes it easier for developers to use it's API.
The core components that we need to take a picture using the CameraX API are below:
- Use Cases: Provides a specific camera functionality
- Preview: use case that provides a camera preview stream for displaying on-screen
- ImageCapture: use case that takes the picture using takePicture()
- PreviewView: view used by the Preview use case to stream the camera into it's surface provider.
- CameraProvider: singleton used to bind the lifecycle of the camera to our composable function
Dependencies
Check here for the dependencies. Here is what I have used at the time of this writing for CameraX and Accompanist permissions.
  //Camera
  implementation("androidx.camera:camera-camera2:1.1.0-alpha08")
  implementation("androidx.camera:camera-view:1.0.0-alpha28")
  implementation("androidx.camera:camera-lifecycle:1.0.1")

  //Permissions
  implementation("com.google.accompanist:accompanist-permissions:0.18.0")
Permissions
For permissions refer to my other post on requesting permissions. It's for location but the concepts are similar. Alternatively, you can also use the Accompanist permissions composable function. It's still experimental but works great!
Building the CameraView Composable function
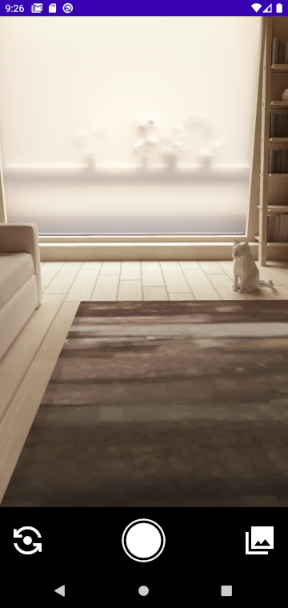
In order to preview the camera and show the required controls needed to work with the camera, we are going to build a composable that we can reuse in our apps. I'm calling it CameraView. This composable is responsible for the following:
- Showing a preview of the camera
- Exposing the below controls:
- Switch: Switches the camera
- Click: Invokes the takePicture method on the ImageCapture use case.
- Gallery: Launches an intent for the user to select a photo
Here is what the CameraView will look like
This function will take two parameters:
- onImageCaptured: callback which will be invoked when the image has been captured. The parent function can than use the image uri to upload the image or use it as needed. The boolean parameter would be true if the image was captured from the gallery instead of camera.
- onError: invoked when there is an error.
CameraView calls a child composable CameraPreviewView which does all the heavy lifting and it listens to the actions from the controls and performs them.
@Composable
fun CameraView(onImageCaptured: (Uri, Boolean) -> Unit, onError: (ImageCaptureException) -> Unit) {

    val context = LocalContext.current
    var lensFacing by remember { mutableStateOf(CameraSelector.LENS_FACING_BACK) }
    val imageCapture: ImageCapture = remember {
        ImageCapture.Builder().build()
    }
    val galleryLauncher = rememberLauncherForActivityResult(
        ActivityResultContracts.GetContent()
    ) { uri: Uri? ->
        if (uri != null) onImageCaptured(uri, true)
    }

    CameraPreviewView(
        imageCapture,
        lensFacing
    ) { cameraUIAction ->
        when (cameraUIAction) {
            is CameraUIAction.OnCameraClick -> {
                imageCapture.takePicture(context, lensFacing, onImageCaptured, onError)
            }
            is CameraUIAction.OnSwitchCameraClick -> {
                lensFacing =
                    if (lensFacing == CameraSelector.LENS_FACING_BACK) CameraSelector.LENS_FACING_FRONT
                    else
                        CameraSelector.LENS_FACING_BACK
            }
            is CameraUIAction.OnGalleryViewClick -> {
                if (true == context.getOutputDirectory().listFiles()?.isNotEmpty()) {
                    galleryLauncher.launch("image/*")
                }
            }
        }
    }
}sealed class CameraUIAction {
object OnCameraClick : CameraUIAction()
object OnGalleryViewClick : CameraUIAction()
object OnSwitchCameraClick : CameraUIAction()
}Here is the CameraPreviewView
@SuppressLint("RestrictedApi")
@Composable
private fun CameraPreviewView(
    imageCapture: ImageCapture,
    lensFacing: Int = CameraSelector.LENS_FACING_BACK,
    cameraUIAction: (CameraUIAction) -> Unit
) {

    val context = LocalContext.current
    val lifecycleOwner = LocalLifecycleOwner.current

    val preview = Preview.Builder().build()
    val cameraSelector = CameraSelector.Builder()
        .requireLensFacing(lensFacing)
        .build()

    val previewView = remember { PreviewView(context) }
    LaunchedEffect(lensFacing) {
        val cameraProvider = context.getCameraProvider()
        cameraProvider.unbindAll()
        cameraProvider.bindToLifecycle(
            lifecycleOwner,
            cameraSelector,
            preview,
            imageCapture
        )
        preview.setSurfaceProvider(previewView.surfaceProvider)
    }

    Box(modifier = Modifier.fillMaxSize()) {
        AndroidView({ previewView }, modifier = Modifier.fillMaxSize()) {

        }
        Column(
            modifier = Modifier.align(Alignment.BottomCenter),
            verticalArrangement = Arrangement.Bottom
        ) {
            CameraControls(cameraUIAction)
        }

    }
}Let's break down the core components of this
- We first build the Preview use case by calling Preview.Builder().build()
- We than specify the CameraSelector, by default it will be the back facing camera
- We initialize the PreviewView and remember it so we store a reference to the same object.
- We than use the LaunchedEffect to listen for changes to lensFacing, get an instance to the CameraProvider and bind the lifecycle. Before we bind, we do unbind all existing use cases.
- We get an instance of the CameraProvider by calling ProcessCameraProvider.getInstance method which will return a ListenableFuture. We than leverage suspendCoroutine to get the reference to it once it's computation is complete. Since we are calling the suspendCoroutine we would also run this under the LaunchedEffect CoroutineScope.
- We than set the SurfaceProvider on the Preview use case to the surface provider on the PreviewView. This will stream all the camera changes onto the UI which we see.
- Finally, we build the layout of our UI by placing the PreviewView in AndroidView composable and also setting our controls which we saw above.
Here is how we get a reference to the CameraProvider
suspend fun Context.getCameraProvider(): ProcessCameraProvider = suspendCoroutine { continuation ->
    ProcessCameraProvider.getInstance(this).also { cameraProvider ->
        cameraProvider.addListener({
            continuation.resume(cameraProvider.get())
        }, ContextCompat.getMainExecutor(this))
    }
}
Next let's look at the code for the CameraControls. This is more of a personal preference on how you define it. I mimicked the ideas from both the Android and iOS for the icons.
@Composable
fun CameraControls(cameraUIAction: (CameraUIAction) -> Unit) {

    Row(
        modifier = Modifier
            .fillMaxWidth()
            .background(Color.Black)
            .padding(16.dp),
        horizontalArrangement = Arrangement.SpaceBetween,
        verticalAlignment = Alignment.CenterVertically
    ) {

        CameraControl(
            Icons.Sharp.FlipCameraAndroid,
            R.string.icn_camera_view_switch_camera_content_description,
            modifier= Modifier.size(64.dp),
            onClick = { cameraUIAction(CameraUIAction.OnSwitchCameraClick) }
        )

        CameraControl(
            Icons.Sharp.Lens,
            R.string.icn_camera_view_camera_shutter_content_description,
            modifier= Modifier
                .size(64.dp)
                .padding(1.dp)
                .border(1.dp, Color.White, CircleShape),
            onClick = { cameraUIAction(CameraUIAction.OnCameraClick) }
        )

        CameraControl(
            Icons.Sharp.PhotoLibrary,
            R.string.icn_camera_view_view_gallery_content_description,
            modifier= Modifier.size(64.dp),
            onClick = { cameraUIAction(CameraUIAction.OnGalleryViewClick) }
        )

    }
}


@Composable
fun CameraControl(
    imageVector: ImageVector,
    contentDescId: Int,
    modifier: Modifier = Modifier,
    onClick: () -> Unit
) {


    IconButton(
        onClick = onClick,
        modifier = modifier
    ) {
        Icon(
            imageVector,
            contentDescription = stringResource(id = contentDescId),
            modifier = modifier,
            tint = Color.White
        )
    }

}Finally, below is the extension function for ImageCapture use case that takes the picture. This code is essentially copied from the CameraX codelab and modified as needed.
private const val FILENAME = "yyyy-MM-dd-HH-mm-ss-SSS"
private const val PHOTO_EXTENSION = ".jpg"


fun ImageCapture.takePicture(
    context: Context,
    lensFacing: Int,
    onImageCaptured: (Uri, Boolean) -> Unit,
    onError: (ImageCaptureException) -> Unit
) {
    val outputDirectory = context.getOutputDirectory()
    // Create output file to hold the image
    val photoFile = createFile(outputDirectory, FILENAME, PHOTO_EXTENSION)
    val outputFileOptions = getOutputFileOptions(lensFacing, photoFile)

    this.takePicture(
        outputFileOptions,
        Executors.newSingleThreadExecutor(),
        object : ImageCapture.OnImageSavedCallback {
            override fun onImageSaved(output: ImageCapture.OutputFileResults) {
                val savedUri = output.savedUri ?: Uri.fromFile(photoFile)
                // If the folder selected is an external media directory, this is
                // unnecessary but otherwise other apps will not be able to access our
                // images unless we scan them using [MediaScannerConnection]
                val mimeType = MimeTypeMap.getSingleton()
                    .getMimeTypeFromExtension(savedUri.toFile().extension)
                MediaScannerConnection.scanFile(
                    context,
                    arrayOf(savedUri.toFile().absolutePath),
                    arrayOf(mimeType)
                ) { _, uri ->

                }
                onImageCaptured(savedUri, false)
            }
            override fun onError(exception: ImageCaptureException) {
                onError(exception)
            }
        })
}


fun getOutputFileOptions(
    lensFacing: Int,
    photoFile: File
): ImageCapture.OutputFileOptions {

    // Setup image capture metadata
    val metadata = ImageCapture.Metadata().apply {
        // Mirror image when using the front camera
        isReversedHorizontal = lensFacing == CameraSelector.LENS_FACING_FRONT
    }
    // Create output options object which contains file + metadata
    val outputOptions = ImageCapture.OutputFileOptions.Builder(photoFile)
        .setMetadata(metadata)
        .build()

    return outputOptions
}

fun createFile(baseFolder: File, format: String, extension: String) =
    File(
        baseFolder, SimpleDateFormat(format, Locale.US)
            .format(System.currentTimeMillis()) + extension
    )


fun Context.getOutputDirectory(): File {
    val mediaDir = this.externalMediaDirs.firstOrNull()?.let {
        File(it, this.resources.getString(R.string.app_name)).apply { mkdirs() }
    }
    return if (mediaDir != null && mediaDir.exists())
        mediaDir else this.filesDir
}Usage
Now that we have our CameraView composable let's look at an example of how to call this function.
CameraView(onImageCaptured = { uri, fromGallery ->
        Log.d(TAG, "Image Uri Captured from Camera View")
//Todo : use the uri as needed

}, onError = { imageCaptureException ->
   scope.launch {
      scaffoldState.snackbarHostState.showSnackbar("An error occurred while trying to take a picture")
       }
})
That's it! We now have our CameraView which we can use within our Permissions Composable or as needed to take a picture. I personally like this implementation in Compose way better than the Android view system.
I would love to hear your feedback on this post and if there is anything you would like to have seen in greater detail.