Configuring Snackbar in Jetpack Compose when using Scaffold with Bottom Navigation

Snackbar in Android provides a feedback to an operation. This is the preferred way to notify users about an action compared to the older toast messages.
With Jetpack Compose, the way we build and show snackbar is slightly different from the traditional view system. I would like to show you one approach you could take in setting up snackbars for your Android application using Scaffold. This is the approach I'm using in my app that is being rebuilt with Jetpack Compose.
Setup
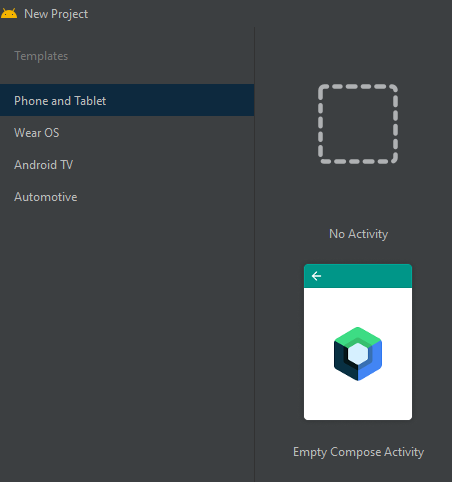
Before we look at how we can configure the Snackbar, let's look at how the app is currently setup. I have created the app using the Empty Compose Activity template.
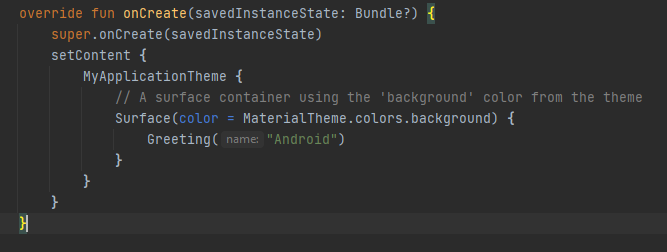
This will create the Material theme for your app as below in the MainActivity
I than abstracted the theme and moved it into it's own composable as shown below. In my case I named it LocationBuddyApp.
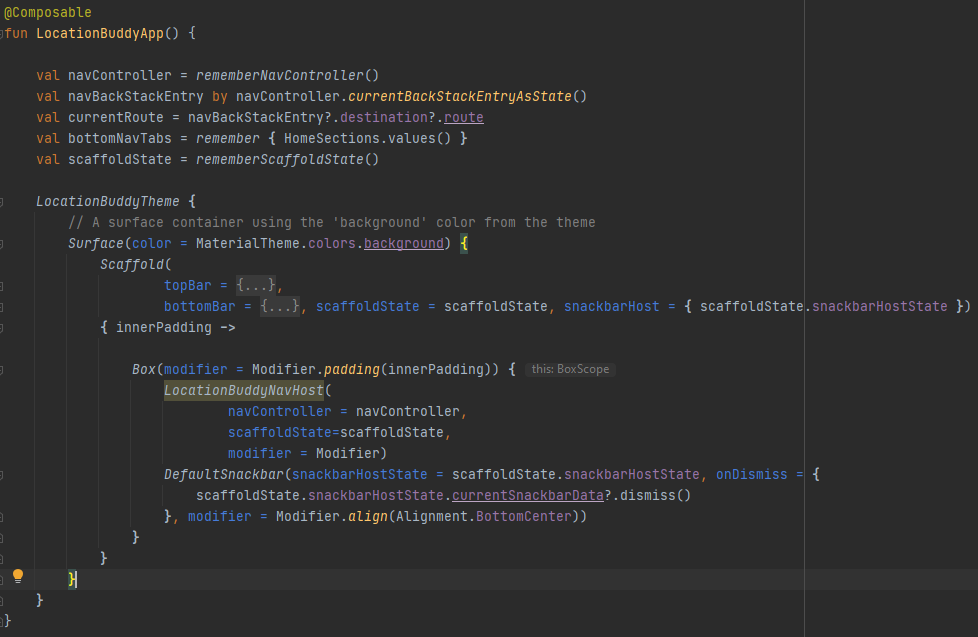
The one change you would notice its that I introduced Material Scaffold. This provides a way for us to tie the different components together for our layout and make sure they work correctly by using the parameters provides in the Scaffold component. It comes with support for some of the commonly used components like TopAppBar and BottomAppBar.
In simple terms, Scaffold is like a top level layout structure for your screen where you can build the contents of the screen and in addition use the commonly laid out slots for AppBars, Drawers, Snackbar and floating action button if you want.
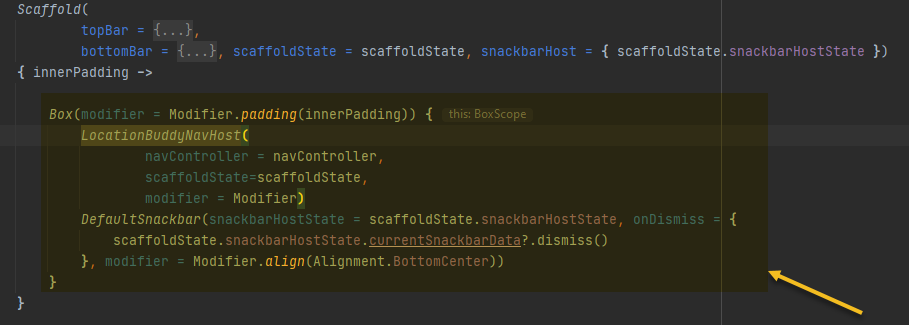
Content for the screen inside the Scaffold
Scaffold config
Now that we have an idea of how the app layout is setup let's look at how we configure our Scaffold component.
In order for us to show the Snackbar we would need to set the below parameters on the Scaffold
scaffoldState: Scaffold provides a parameter for ScaffoldState that holds the state of the layout and the sizes of the components after the layout has happened.
To create a ScaffoldState in the Composable that hosts the Scaffold, that we can pass to the Scaffold component, we could do it by calling rememberScaffoldState. For example, val scaffoldState = rememberScaffoldState()
snackbarHost: When we create scaffoldState as shown above, we also get access to an instance of SnackbarHostState that can be used to show Snackbars inside of the Scaffold.
We than pass two parameters as below to our Scaffold

Snackbar Config
The next part is configuring the Snackbar. At this point, if we just want to show the snackbar, we could so by using the below code within our Scaffold
 scope.launch { //where scope is generated from rememberCoroutineScope()
   scaffoldState.snackbarHostState.showSnackbar("Hello World!")
 }
But if we want to make a reusable component that we can leverage for different use cases, we could abstract the Snackbar as below. The below code is not something I came up with. It was taken from the Jetpack Compose Samples and slightly modified to my app.
@Composable
fun DefaultSnackbar(
        snackbarHostState: SnackbarHostState,
        modifier: Modifier = Modifier,
        onDismiss: () -> Unit = { }
) {
    SnackbarHost(
            hostState = snackbarHostState,
            snackbar = { data ->
                Snackbar(
                        modifier = Modifier.padding(16.dp),
                        content = {
                            Text(
                                    text = data.message,
                                    style = MaterialTheme.typography.body2
                            )
                        },
                        action = {
                            data.actionLabel?.let { actionLabel ->
                                TextButton(onClick = onDismiss) {
                                    Text(
                                            text = actionLabel,
                                            color= MaterialTheme.colors.primary,
                                            style = MaterialTheme.typography.body2
                                    )
                                }
                            }
                        }
                )
            },
            modifier = modifier
                    .fillMaxWidth()
                    .wrapContentHeight(Alignment.Bottom)
    )
}
Here we have more control over the Snackbar component. Let's analyze what it's doing:
-
First we define a Composable that takes three parameters
- snackBarHostState: The state of the snackBarHost we previously have access to from scaffoldState.
- modifier: Further ability to customize the styling of the Snackbar if the DefaultSnackbar does not meet our needs.
- onDismiss: When provided, will invoke an action on the Dismiss button on the right side of the Snackbar
-
We than build the Snackbar with the desired styling and also provide the optional action content which is rendered if the actionlabel is provided. We will come to this later.
-
Finally we specify the modifier to show the snackbar at the bottom of the screen.
We would than add the DefaultSnackBar to our default screen in the below manner, so we could reuse it across different screens
Showing Snackbar in other Composable Screens
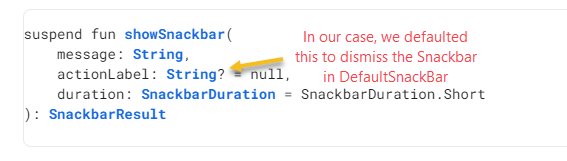
We are almost there! The final step is to show our Snackbar. We do this by calling the showSnackbar method on the SnackbarHostState.
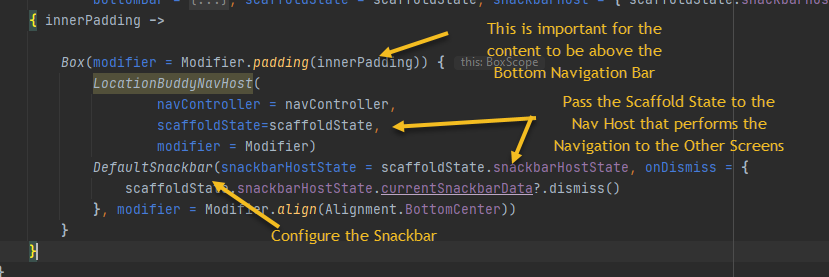
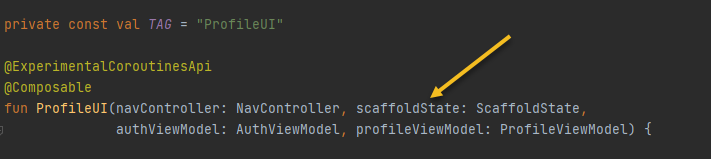
In my app, I want to be able to show the snackbar messages in different screens on different operations. I do this by making sure, the ScaffoldState that we initially built, is passed to the downstream screens.
We can than use scaffoldState to show the message. In the below example I use LaunchedEffect as the change to the message happens in my ViewModel and we also need to launch the showSnackbar suspend function inside a coroutine.
  LaunchedEffect(uiMessage) {
        uiMessage?.let { message ->
            scaffoldState.snackbarHostState.showSnackbar(message)
        }
    }
You could also provide a default action Label and call it Dismiss as that's the default action we perform. But you can definitely override this to meet your needs or even pass it as a parameter to your other screens.
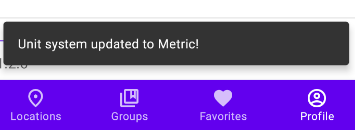
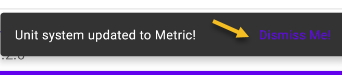
This is how the Snackbar would show once everything is setup and working, above the bottom navigation bar.
When using the actionLabel parameter
scaffoldState.snackbarHostState.showSnackbar(message,"Dismiss Me!")
That was quite some information for implementing a Snackbar but once you have it in place, it becomes very easy to show the Snackbar message across different screens.
Let me know in the comments, if you have any questions regarding this implementation or any ideas to make it even better.