Setting up Remark42(self-hosted comment engine) from Scratch

Having a comment engine is essential to engage with users, and in the process also learn new things, share ideas, solve problems and provide solutions. Today, I want to show you how I have setup Remark42, an open source commenting system on my blog.
Why Remark42?
Apart from all the goodies explained here, the below reasons are why I primarily chose Remark42:
- Focus on data privacy
- Modern looking UI compared to others
- Easy configuration of the OAuth providers
- Good community support
What configuration was used
- Self hosted Ghost blog on Azure VM using Linux Ubuntu 18.04 on B1s plan
- 1 GB RAM
- 1 vCPU
- Access to Linux VM using Putty and WinSCP on Windows
Installation Process Overview
Below is a high level overview of the process
- Installing Docker Engine and Docker Compose
- Configuring Remark42 Docker Compose File
- Installing Remark42
- Configuring Subdomain as A Address Record on DNS
- Configuring Nginx and Setting up SSL
- Adding remark42 on Ghost Theme
Installing Docker Engine and Docker Compose
According to the documentation, using Docker is the recommended way to setup and run remark42. We will look at this approach for installing remark42. If you are new to using Docker, this tutorial is a good place to give you an understanding of how containers work.
First, we need to install Docker engine and Docker Compose. The links should be helpful to install both Docker and Docker Compose.
Here are the commands I ran on my machine at the time of writing this blog from the official documentation
Docker
sudo apt-get update

sudo apt-get install docker-ce docker-ce-cli containerd.io

//Run below command to verify that Docker engine is installed correctly
sudo docker run hello-worldDocker Compose
//Run below command to download the current stable release of Docker Compose
//Check https://github.com/docker/compose/releases/ for other versions or latest version at the time you are running this
sudo curl -L "https://github.com/docker/compose/releases/download/1.29.2/docker-compose-$(uname -s)-$(uname -m)" -o /usr/local/bin/docker-compose

//Apply executable permissions to the binary
sudo chmod +x /usr/local/bin/docker-compose

//Test the installation
docker-compose --versionConfiguring Remark42 Docker Compose File
Once we have Docker and Docker Compose installed, we need to build our Compose file to define our remark42 application configuration. This file needs to sit in the folder where you plan to configure remark42 on the VM. We will look at this in the installation section later.
We will start with the basic compose file and make some minor tweaks. Primarily the port is exposed directly in our configuration
version: '2'

services:
    remark:
        build: .
        image: umputun/remark42:latest
        container_name: "remark42"
        hostname: "remark42"
        restart: always

        logging:
            driver: json-file
            options:
                max-size: "10m"
                max-file: "5"

        # uncomment to expose directly (no proxy)
        ports:
          - "8080:8080"

        environment:
            - REMARK_URL=https://www.remark42.devbitsandbytes.com  # url pointing to your remark42 server. Depending on your configuration you might not need www
            - SITE=remark42.dynamicsforcrm   #id for the site which will also be used in the script we embed on our website
            - SECRET=somepasswordhere   #shared secret key used to sign JWT, should be a random, long, hard-to-guess string
            - STORE_BOLT_PATH=/srv/var/db
            - BACKUP_PATH=/srv/var/backup
            - AUTH_GITHUB_CID=
            - AUTH_GITHUB_CSEC=
            - AUTH_GOOGLE_CID=
            - AUTH_GOOGLE_CSEC=
        volumes:
            - ./var:/srv/var
In the above file, I am planning to configure Github, Google and Email as authentication providers.
Configuring Google OAuth Provider
Create a new project https://console.developers.google.com/project
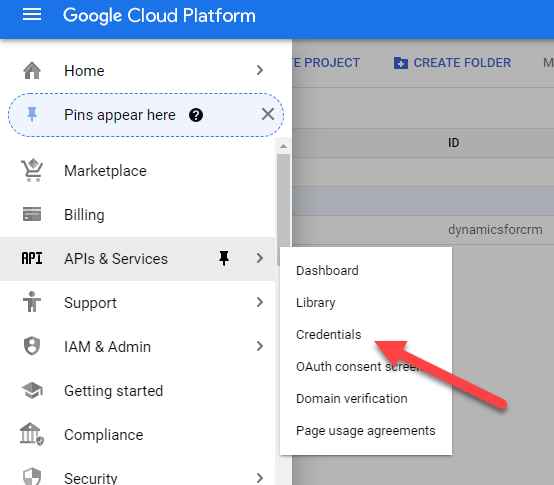
Navigate to the Credentials
Create OAuth Credentials, select Configure Consent Screen and choose External
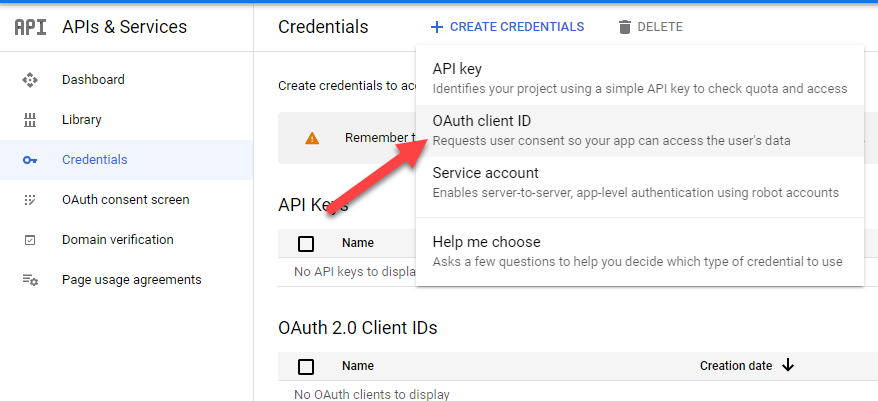
Follow the steps to finish setting up your consent screen, this will than allow us to create the actual credentials. Go back to Credentials and click Create Credentials again. This time we will be shown the UI for the client ID creation.
Here is how my configuration looks like, click Create.
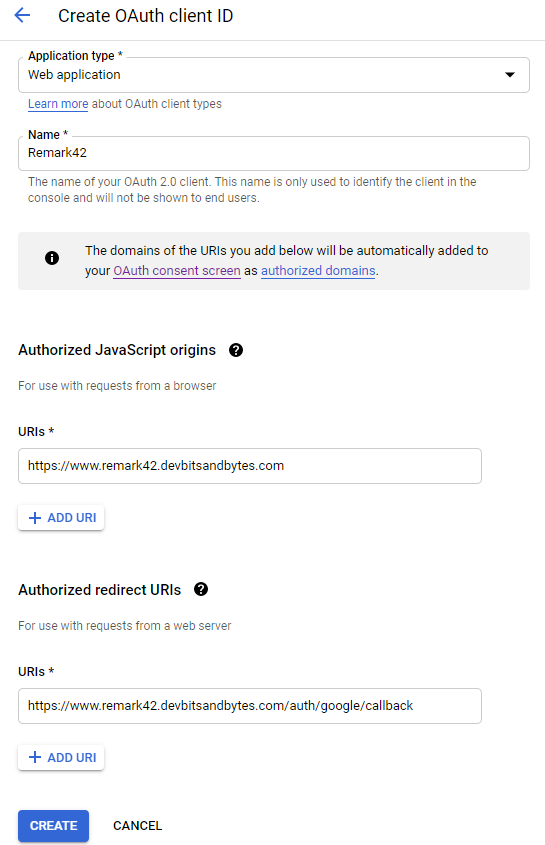
You will now be presented with the Client ID and Secret, copy these values and update the following parameters on Docker compose file
- AUTH_GOOGLE_CID
- AUTH_GOOGLE_CSEC
Configuring GitHub OAuth provider
Navigate to https://github.com/settings/developers and create a new OAuth app.
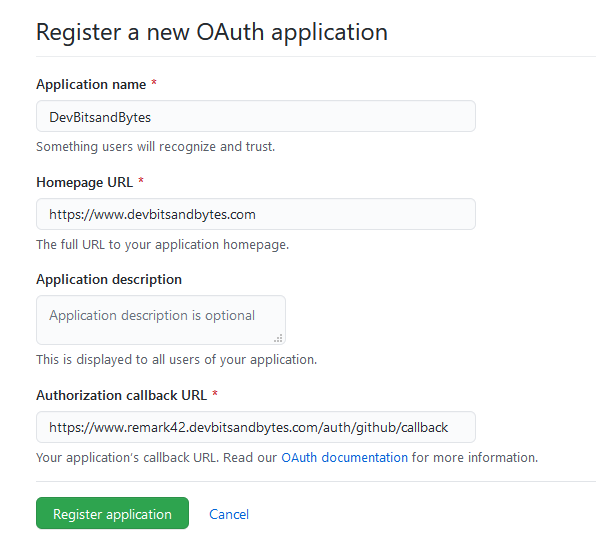
Generate a new client secret and update the below values in the Docker compose file
- AUTH_GITHUB_CID
- AUTH_GITHUB_CSEC
Configuring Mailgun
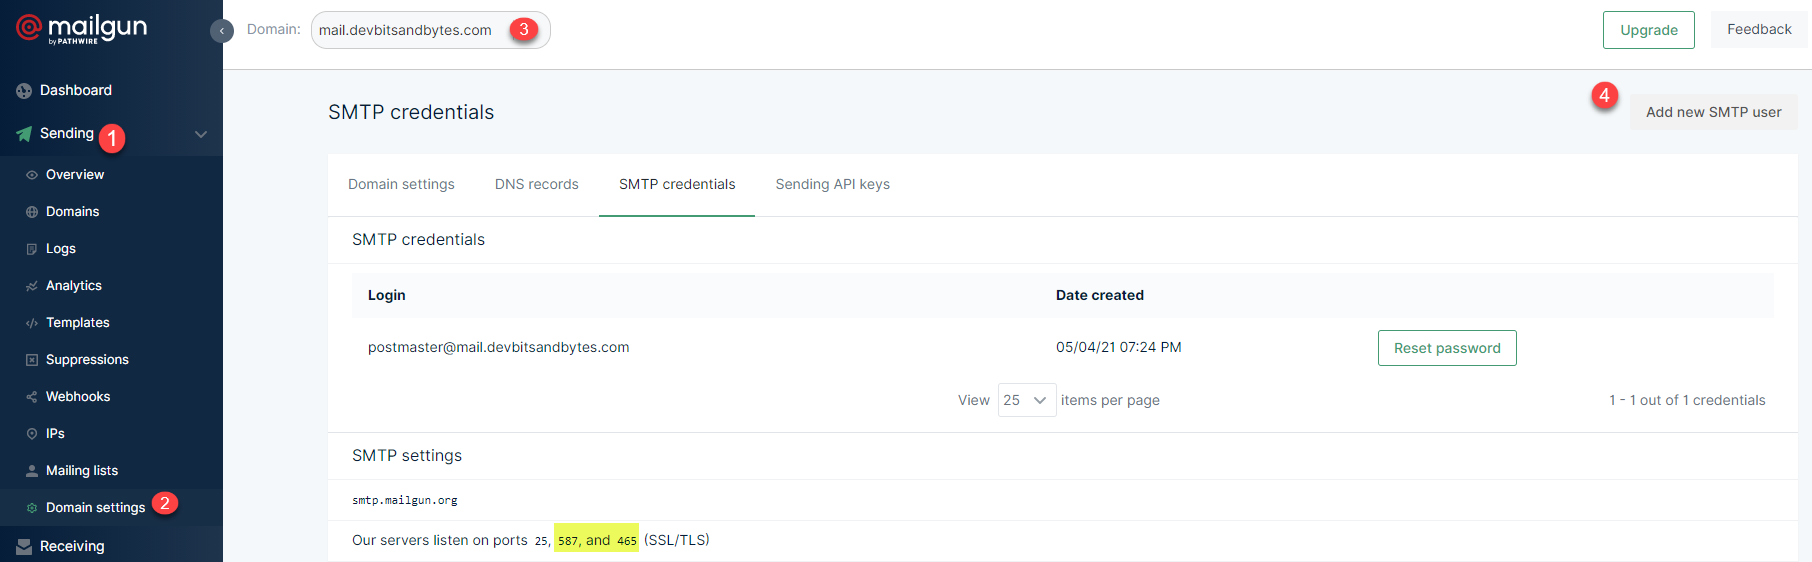
I have used Mailgun email service to enable the email related capabilities tied to Remark42. Based on the documentation for email configuration, we configure the below settings for SMTP. In addition, I also plan to expose email authentication on my website so I added these parameters as well for docker compose which are listed using AUTH_EMAIL.
- ADMIN_SHARED_EMAIL=support@devbitsandbytes.com #where Admin related emails need to be sent, change this to yours
- AUTH_EMAIL_ENABLE=true
- AUTH_EMAIL_HOST=smtp.mailgun.org
- AUTH_EMAIL_PORT=465
- AUTH_EMAIL_FROM=noreply@mail.devbitsandbytes.com #Change this to your site
- AUTH_EMAIL_SUBJ=remark42 confirmation
- AUTH_EMAIL_CONTENT_TYPE=text/html
- AUTH_EMAIL_TLS=true
- AUTH_EMAIL_USER=postmaster@mail.devbitsandbytes.com
- AUTH_EMAIL_PASSWD=secret123 # generated when a SMTP user is created
- AUTH_EMAIL_TIMEOUT=10s
- NOTIFY_EMAIL_FROM=noreply@mail.devbitsandbytes.com
- NOTIFY_EMAIL_ADMIN=true # notify admin on new comments
- SMTP_HOST=smtp.mailgun.org
- SMTP_PORT=465
- SMTP_TLS=true
- SMTP_USERNAME=postmaster@mg.example.com
- SMTP_PASSWORD=secretpassword
If you just want the SMTP and do not plan to use Email authentication use the below parameters
- NOTIFY_EMAIL_FROM=notify@example.com
- SMTP_HOST=smtp.mailgun.org
- SMTP_PORT=465
- SMTP_TLS=true
- SMTP_USERNAME=postmaster@mg.example.com
- SMTP_PASSWORD=secretpassword
You can retrieve these values under Mailgun as below
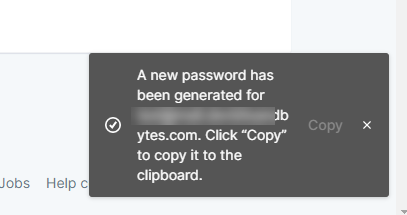
When you create a new SMTP user, you would get a notification for the password as shown below. Make sure to copy this value or else you would need to Reset the password.
Installing Remark42
Once we have specified all the parameters and built our compose file, we would have something like below
version: '2'

services:
    remark:
        build: .
        image: umputun/remark42:latest
        container_name: "remark42"
        hostname: "remark42"
        restart: always

        logging:
            driver: json-file
            options:
                max-size: "10m"
                max-file: "5"

        # uncomment to expose directly (no proxy)
        ports:
          - "8080:8080"

        environment:
            - REMARK_URL=https://www.remark42.devbitsandbytes.com  # url pointing to your remark42 server
            - SITE=remark42.devbitsandbytes.com   #id for the site which will also be used in the script we embed on our website
            - SECRET=xxxxxxxx  #shared secret key used to sign JWT, should be a random, long, hard-to-guess string
            - STORE_BOLT_PATH=/srv/var/db
            - BACKUP_PATH=/srv/var/backup
            - AUTH_GITHUB_CID=xxxxxxxx
            - AUTH_GITHUB_CSEC=xxxxxxxx
            - AUTH_GOOGLE_CID=xxxxxxxx
            - AUTH_GOOGLE_CSEC=xxxxxxxx
            - AUTH_EMAIL_ENABLE=true
            - AUTH_EMAIL_HOST=smtp.mailgun.org
            - AUTH_EMAIL_PORT=465
            - AUTH_EMAIL_FROM=noreply@mail.devbitsandbytes.com
            - AUTH_EMAIL_SUBJ=remark42 confirmation
            - AUTH_EMAIL_CONTENT_TYPE=text/html
            - AUTH_EMAIL_TLS=true
            - AUTH_EMAIL_USER=postmaster@mail.devbitsandbytes.com
            - AUTH_EMAIL_PASSWD=xxxxxxxx
            - AUTH_EMAIL_TIMEOUT=10s
            - ADMIN_SHARED_EMAIL=support@devbitsandbytes.com #where Admin related emails need to be sent
            - NOTIFY_EMAIL_ADMIN=true
            - NOTIFY_EMAIL_FROM=noreply@mail.devbitsandbytes.com
            - SMTP_HOST=smtp.mailgun.org
            - SMTP_PORT=465
            - SMTP_TLS=true
            - SMTP_USERNAME=postmaster@mail.devbitsandbytes.com
            - SMTP_PASSWORD=xxxxxxxx
            - ADMIN_PASSWD=xxx  #useful for performing API operations as an admin using Basic Authentication with username=admin
            - NOTIFY_USERS=email
            - NOTIFY_ADMINS=email
            - NOTIFY_TYPE=email

        volumes:
            - ./var:/srv/var
Now let's add this file into the below folder on our VM
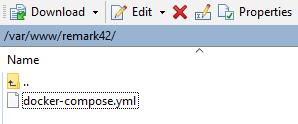
We are ready to run the docker commands to install remark42. First let's check to see which Docker containers are in the VM
docker container ls -aWe have one container that is running the hello-world image when we installed Docker.

Now,install remark42 using the docker compose command
docker-compose pull && docker-compose up -d The above command does two things:
- docker-compose pull: Pulls the image associated with the service defined in docker-compose.yml which is remark42. It uses the default tag of latest to get the latest version of remark42
- docker-compose up -d: Create and start the container in background.
If the installation went correctly without any issues we should see the following response

Let's verify if the remark42 server is now running. We can simply ping the localhost URL to see if we get a 'pong'
curl http://127.0.0.1:8080/ping

We now have remark42 successfully installed but it's not exposed to the internet. Let's look at configuring this in the next sections.
Configuring Subdomain as A Address Record on DNS
Currently our Ghost blog on which you are reading this article is available on https://www.devbitsandbytes.com
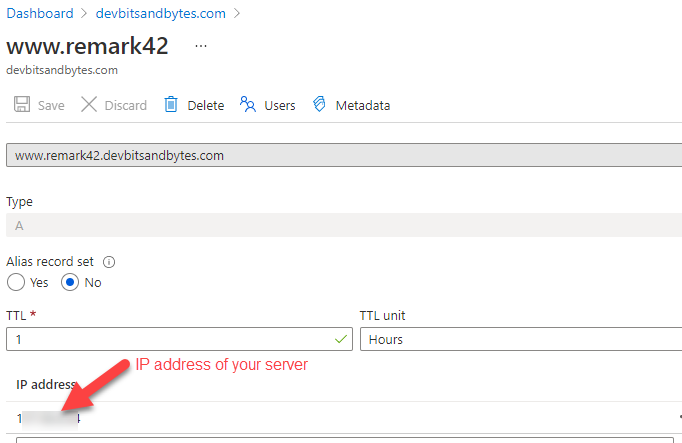
In order for us to access remark42.devbitsandbytes.com on the same Linux server where we have both our Ghost blog and remark42 running, we need to configure the A address record on our domain. I currently use Azure DNS but the process is pretty much the same for any domain provider like GoDaddy, Domain.com etc.
Make sure to configure the A record to match what you have provided in the Docker compose file
Now if we try to access the demo page provided by remark42 at ${REMARK_URL}/web we see a 404 error.
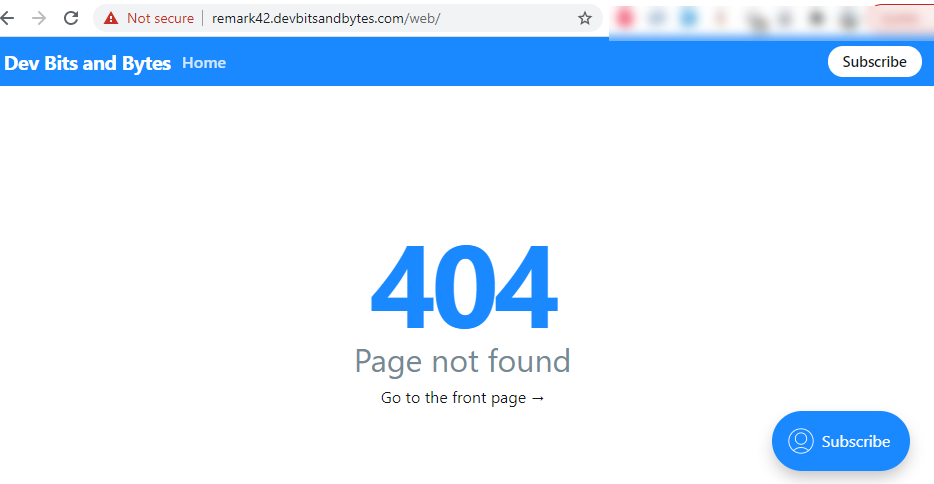
It basically tries to search the Ghost blog instead of targeting the remark42 site on the same server. This is because we haven't configured Nginx on our server to point to remark42 site as a subdomain. Let's look at configuring Nginx next.
Configuring Nginx and Setting up SSL
To configure Nginx for our remark42 site, we would need to create a new configuration file for remark42 to better manage the site instead of messing with the default file. This is all done already for us when we installed Ghost platform on the server.
Run the below commands to create the config file in the folder etc/nginx/sites-available/. I ran the below commands under the root user.
touch www.remark42.devbitsandbytes.com.conf

vi www.remark42.devbitsandbytes.com.conf
Press "i" to enter edit mode, and paste the below configuration. Make sure to update the server name to match yours.
Note: I have temporarily enabled port 80 on my Linux server while I configure Nginx and SSL
server {

    listen 80;
    listen [::]:80;

    server_name www.remark42.devbitsandbytes.com;

    location / {
         proxy_set_header        X-Forwarded-Proto $scheme;
         proxy_set_header        X-Real-IP $remote_addr;
         proxy_set_header        X-Forwarded-For $proxy_add_x_forwarded_for;
         proxy_set_header        Host $http_host;
         proxy_pass              http://127.0.0.1:8080;
     }

}
Save the configuration file by pressing Esc and typing :wq to exit the file.
Now, create a symbolic link(shortcut to the original file) instead of maintaining two copies using the below command
ln -s /etc/nginx/sites-available/www.remark42.devbitsandbytes.com.conf /etc/nginx/sites-enabled/www.remark42.devbitsandbytes.com.conf Check if the syntax of the configuration file does not have any typos or issue:
nginx -tRestart Nginx for the changes to take place
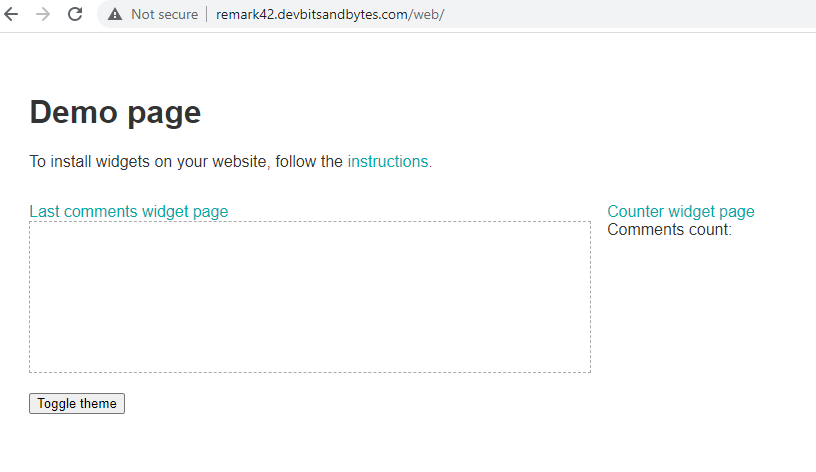
systemctl restart nginxNow if we access the remark42 site on http, we should be able to access it
Let's configure SSL, so we can serve it over https. For this, we would use the wonderful Certbot utility.
Run the below command to request a certificate for the remark42 site.
sudo certbot --nginx
Select your site and if everything goes well, your certificate should be good to go. To test this, navigate to your site ${REMARK_URL}/web but this time over https.
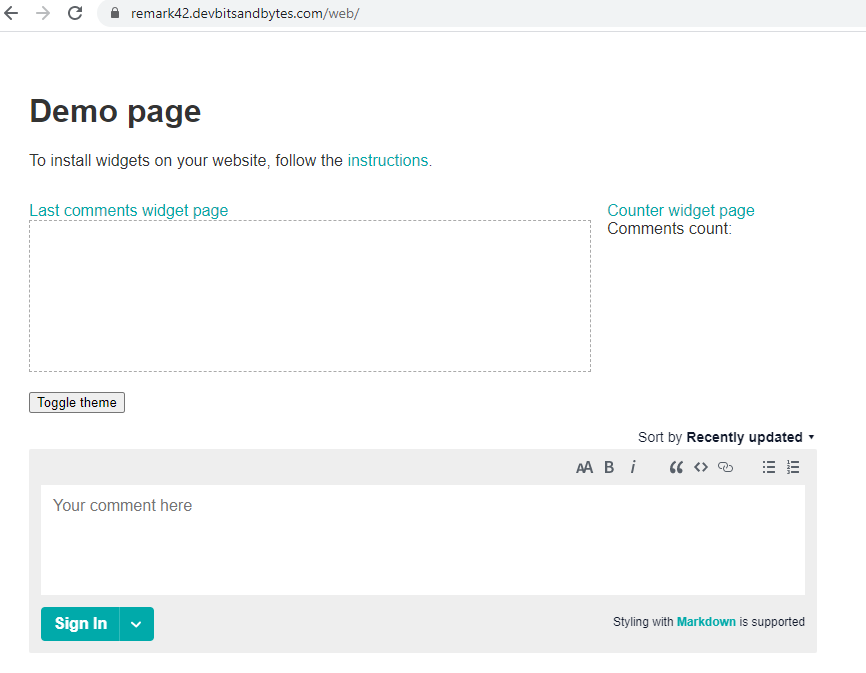
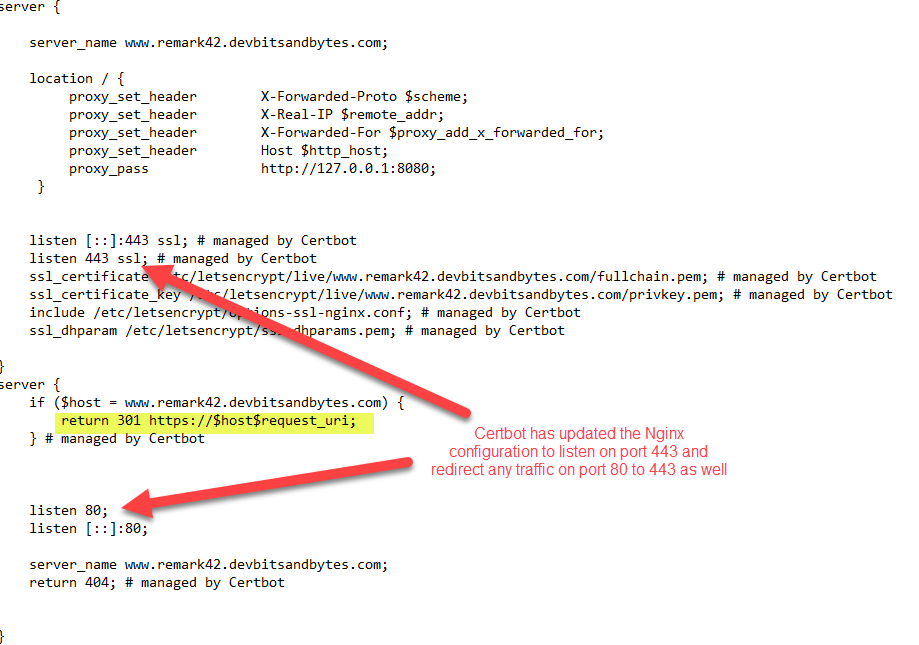
You should now see the widget, and the comment control is also available. At this point, you can disable inbound traffic on port 80 for your virtual machine. Nginx will automatically redirect any traffic on 80 to 443. This is updated in the Nginx configuration by Certbot utility when it installed the SSL certificate.
Adding remark42 on Ghost Theme
If you have made it this far, great job! We are almost close to the finish line with just one last configuration to finish. The final step is displaying the comment control on our Ghost blog.
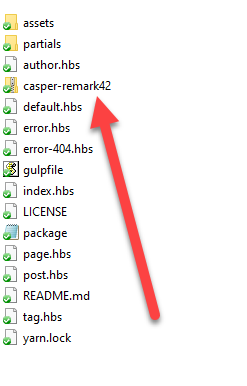
Navigate to Settings ->Theme section in your Ghost admin portal and download the theme on which you want to add the comment widget. In my case, I am just using the casper theme.

Extract the contents of the zip file and open post.hbs, you should see the below snippet of code to add the widget under this dedicated section.
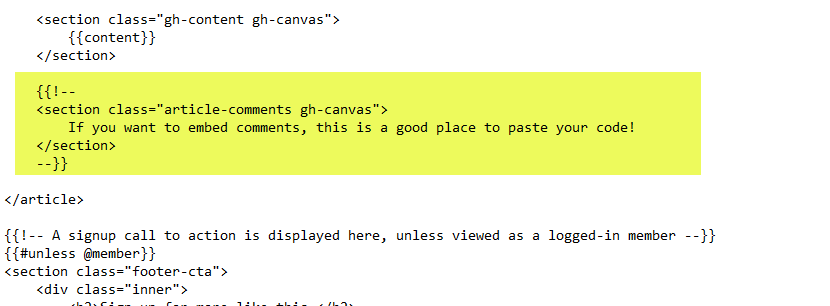
Note: I'm currently using the Ghost v4, so this might be slightly different if you are on an older version. Check the official documentation if you are unsure
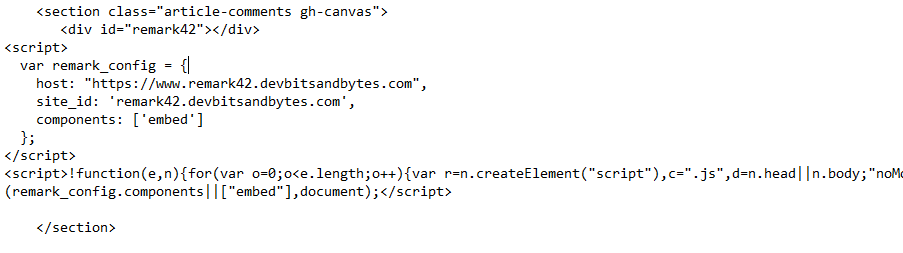
Uncomment the code by removing {{! -- and --}} from the highlighted section above and paste the below snippet for your site configuration by editing remark_config object.
<div id="remark42"></div>
<script>
  var remark_config = {
    host: "https://www.remark42.devbitsandbytes.com",
    site_id: 'remark42.devbitsandbytes.com',
    components: ['embed']
  };
</script>
<script>!function(e,n){for(var o=0;o<e.length;o++){var r=n.createElement("script"),c=".js",d=n.head||n.body;"noModule"in r?(r.type="module",c=".mjs"):r.async=!0,r.defer=!0,r.src=remark_config.host+"/web/"+e[o]+c,d.appendChild(r)}}(remark_config.components||["embed"],document);</script>
For a complete list of options check the documentation. After the changes, we should see something like below
Save the post.hbs file, select all the files into a new zip file as a new theme and upload back into your Ghost site and activate it.
Refresh your page and you should now see the widget appear on your Ghost blog.
Congratulations! You have now configured remark42 on your Ghost platform.
What did you think of the setup? Let me know in the comments below if you thought the setup was complicated, easy or ran into issues.
Other Resources
Below are the resources that helped me along the way to understand some of the underlying concepts tied to Nginx and Remark42. The first link is the primary source from which all of my implementation is based on.